Sunday 16 March 2014

Creating ' Me ' scrapbooking pages

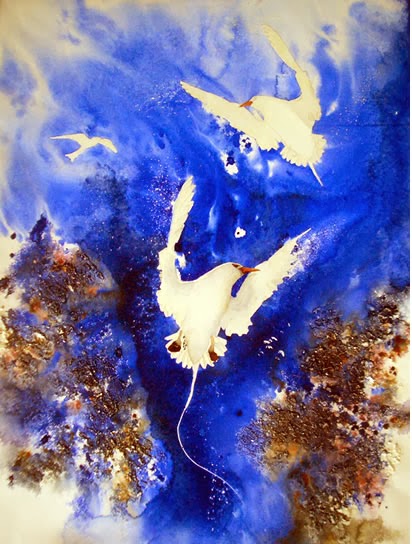
Tattoos of Memories (IRL scrapbooking page
from 2009 - I doodled the gold swirls on by
hand with a gold pen.
I use scrapbooking (and now digital scrapbooking) like a personal journal. I hate filling out diaries - they are just not my thing - but I love creating art journals or arty scrapbooking pages. At first, it was really difficult to do 'me' pages.

For most of my eight years or so of scrapbooking it was very, very rare. I hated photographs of myself and couldn't work out why anyone would want to do a 'me' page.

And then, in 2009,  I found that I could use scrapbooking pages to spill my feelings out onto during a crisis point in my life. I used to find it really difficult to talk about what I felt and to even know what feeling I was experiencing - it was like a loud noisy mess in my head, and I couldn't separate them out.

When I was really down I would pull out the camera and take shot after shot of attempts to smile. Sometimes that was really difficult - and took about eight or ten shots before I was able to relax my face enough into a natural looking smile. After I got out of that depressive cycle, then I could use the photos I had taken to create a scrap page. It was almost like something good had come out of feeling so bad.

I realised that I could take 'selfies' and delete any pictures I didn't like. I found that there was a side I liked to be taken from, and because my digi camera has a swivel screen, I could see what I was taking.

Grief 2009 IRL scrapbooking page
I spent alot of time crying on the end of my
bed with my teddy bear, so I took some pics of that and
scrapped it. It actually helped to deal with what was
going on. The little bird is hand stitched.
I would have periods of colour and brightness, and then a string of black backgrounds and black, black, black layouts.

At first too, I hid my journaling. But after a while, I realised that I could share my journaling, as long as it was broad enough to capture what I felt, but not actually providing any details. I could bleed out onto my scrapbooking pages. During 2010 I found this very helpful.

And then, the online scrapbooking community reached out to me. At first, I was shocked. I didn't realise that some of the stuff I was dealing with happened to other people - I always thought I was different and all alone, and because I'd never been game enough to share my feelings with anyone else IRL, I had no idea that this would be the case.

In 2010 the Black Period happened. I couldn't create any page without it having a black background. At first I struggled with this. Black just wasn't fashionable in 2010, but page after page kept coming out black. Plus, I loved bright colours, and not being able to use them frustrated me. Finally I decided to go with it and continue to enter comps with my black pages. The site I was with then were very friendly, easy to use, and comps that were not too rigid. I actually won a prize with a black page during this period (Kookaburra 2010). The pages weren't all as personal as some that are here - some
2009 'Lost' - still afraid to use black, I produced this page
where I wondered what had happened to this girl (me
as a teenager)
were flower pages, or bird pages and one was of my cousinette - but they were very black! And then, after weeks and months of black pages, I was finally able to create colourful pages again. Bliss!

For the first time in my life, I began to respect myself as a person, and after the Black Period I was keen to create pages of myself and about what I did and who I was and what I thought. I really felt like it was time to get to know myself and what sort of person I was. I used scrapbooking for that.

And I've continued with that up to today. And I've found myself in this way. And I'm learning new things about myself still as well.

Of course, the darkness still comes to visit now and then, but its way shorter and less drowning.

After my Nan died last year (at age 98) it seemed that I was more able to deal with her passing and all the things that happened around that, because of my earlier experiences. Plus, I'd never really lost someone I truly loved before. For a while, all my pages were about Nan and my feelings for her. Mind you, there were moments of despair and darkness, but I used alot of different methods of getting through - talking to her outloud, painting her, writing memories I had of her, and even doing things I knew Nan would have liked.

Do I recommend others do 'me' pages? I suppose I do. But I don't say everyone has to. It worked for me and is still working as an outlet for me. I have so much more control over how a page will look artistically with digital scrapbooking, that I am able to go much further than I could with IRL scrapping. But we are all different. 

PS I should point out that there were lots of pages in my Black Period - it did go for months - far more than I have shared here.


2010 Starlight - part of my Black Period - I used photos of
myself to create the starburst. The black paper in the
background is black plastic wrapping paper from the
florist. I used lots and lots of it.

2010 Practising Smiling
One of the many pages that used pictures I had taken
of me in one of those downer moods. I had felt like S#@!
at the time, but was then able to create a me page
later, so it felt like something good had come out of it.

2010 The Forest
Another from the Black Period - those crows are Fleur
de Lys from patterned paper. The stars are stamped on,
and the gnarly tree branches are drawn on with a
white pen,. See - very dark page! I got very attached
to my white pen during this period.


2010 Kookaburra. I wont a prize for this page. This was
during the Black Period - I used bubblewrap to create
the circles with paint and then outlined them with a white
pen. The doodle border is created by hand and
coloured in with the white pen. Something good can
come out of a dark period in my life.


Saturday 15 March 2014

Soul Art - how did I create it

So many people ask me how I do my digi pages. To be honest, it does kind of evolve and happen, but if you do want to see how I build up a page myself, then this is it! I'm using my page 'Soul Art' as the example.

Everything you see is a layer - a little saved window with an item or items grouped together in it. All the layers together add up to a page. Each layer you can change the transparency on so that some layers are see through, and others are solid.

Digi scrapping without set templates (you can buy templates were you just whack your pic into the page and everything else is already done. I don't use them - I like to create all my pages from scratch) is all about the layers. Which one sits above another one - just like on an IRL page. 

1. First I scan in some newspaper clippings
and cut / arrange them on the page (kind of
like I would for a page IRL

2. Then I use some of the brush effects in
the application (airbrush) to spray on some
yellow. (i've used two shades of yellow)
Pop a pic on, and setup some masking
in front and behind it.

3. I've popped on a page mask which adds
texture to the layout. Added a mask with the
spots, and the black flower outline. The green
is patterned paper that I have used the
Marque tool on (and Feather) to cut out
some pieces with a faint edge.

4. I've added some paint splotches to where I want
the 'hair' to be. I've also sprayed a bit of
blue on the left, and added a faint white
spray to lighten some areas to get a
more dramatic effect.


5. Then I get busy and add some roses,
violas and other flowers to the layout,
sit them over the purple paint splotches
and change their colour to match that purple.
I also use the software to transform the
flowers by mirroring and turning them,
and changing sizes slightly, so they
look like lots of different flowers,
even though there are only four
different flowers. Some flowers
are also darker than others to
create depth.
6. Then I add finishing touches; the
watch, the journaling text (made it up)
the title, and added a bit more colour to
the top of the page

managing my digi scrap stash

It's funny how I do stuff and I don't really think about it. Like managing my digi scrap stash. Yes - you still have to sort and manage your stash even if its digital!

Because its for digi scrapping, where I have full control over the colour (you can change the colour of anything - though white is sometimes tricky to get off a coloured item), there is no point for me to sort my digi stash in to colours.

I also thought about placing all the bits from the same kits together; but this just didn't work for me. But at the same time, if I was going to follow the usage of most of the images, I need to keep track of what belonged to what kit, so I could credit it when I publish the page online. (And I like to do this)

I decided to manage my stash with folders (just in Windows Explorer). I bought an external hard drive - which has all my photos and digi stash on it, particularly as my computer is a little older.

First I setup a 'digital' directory and two main folders; one for the stash, and one for pages I'm working on or created.

Stash Area - Bought That Pack - ITEM A
Then I created an area to record which kits I've purchased, what they are called, etc. Most kits come with their own little advertiser of what's in the kit - so I used these pics to make it nice and pictorial.

ITEM A - an example of how I organise the kits I've bought/dowloaded. the pictures on the right are supplied by the kit designer. On the left I use where I bought it from, rather than the brand. For me, this is easier - because some brands are available across many websites.

If I also change the file name of the kit picture to the name of the kit, then I don't necessarily have to open it up to get the details I need to credit the item I have used.

Stash Area - Categorising The Bits - ITEM B

I also like to categorise the bits out of each kit, so I can find them quickly and easily, and don't have to trawl. Trawling takes precious time!! I use traditional headings like "patterned paper", "ribbon", "buttons" etc but I also use extra ones like 'Household items' for furniture and the like.I find my brain looks for items in the traditional way. Now and then, I delete a category, or rename it, or move items out and create a new category - it's always evolving.

I can remember most items in my head, but the patterned paper gets harder and harder the more kits I have purchased or downloaded (in some cases like Far Far Hill I have freebie kits - but they still need to be credited when I put work up online). 

ITEM B


 Stash Area - Categorising the bits - inside the folders ITEM C
I take time after downloading a kit, to rename each item with the name of the kit but leave the item reference number in. It can take a little time - like ten minutes or so, (depending on how many items there are) but I find this worthwhile. (I type the first on in, and then copy and paste it into the others - being careful to click in and move to the left of the reference number for that item)

Some the pack graphics that I use don't include all items in the picture, whilst others items are obscured. The quicker I know which kit it came from for my Ingredients the better.

ITEM C - inside the category folders

Deleting items from Kits
Yes, sometimes I do this. If I know most definately I'll never ever use one item in a whole kit, I will remove it. There's no point it taking up room. Sometimes I have a bit of a clean out six months after I bought the pack, and if I always shy away from using an item, then I will delete it.

Downloading kits
I found this really tricky when I first started. Now I know to create a Downloading directory off my Desktop or My Documents and make sure I only unzip kits one at a time, to avoid confusion. And then move the items into folders on my external drive. My first five downloads I lost the items somewhere (I think I deleted them by accident) and I had to send a very apologetic email to the supplier and ask if I could have access to download again. Of course, they let me, but I felt stupid!

Ingredients
I use this term to describe what I have used to create a digi page or card. I find it all encompassing, and it does feel sometimes like I'm cooking a cake or bending a page into the shape of my will, when I create a digital page.

Searching Through Patterned Papers
When I'm looking through the papers folder, this is the only one where I really can't see the pattern or detailing on the page too clearly. I've found with experience that instead of using the File, Insert inside the application I am using to create the page, I am far better off to go to Windows Explorer and turn on the Filmstrip View and find the patterned papers I need from that (record the name or similar) and then use File, Insert inside the application.

But using the File, Insert for all other categories seems to suffice to see what the item is and whether it will suit for the page or not.


Adding Ingredients to the Displayed Page - finding the ingredients
I usually create the Ingredients in Microsoft Word (I have an Ingredients page on the desktop) in one huge paragraph and then copy and paste them into the site online where my page is. When I do this, I split the view - so I can see both the Word page and Windows Explorer at the same time. I've found this saves HEAPS of time.
When I add in the ingredients, I usually put the Brand first, then the name of the kit, and then the reference name of the element from that kit. If I've used more than one from that kit, I put brackets around the whole lot, so I don't have to repeat the kit name over and over. for example:
"Laura Burger Going In Circles – bitz no 2"
or
"[Laura Burger Going in Circles - bitz no 2, no 3, no 5]"
Even if the download was for free, I still credit the kit name or where I got it from.


Saturday 1 March 2014

ARTastic March 2014 DT

I love the ARTastic comps - they give my creative brain a real challenge, and at the same time I get to scrap something about me and use some of my many photos!

I loved the inspiration for the March 2014 challenge and really wanted to do it as much justice as possible! I went with a bird theme inspired by the challenge.

ARTastic March 2014 challenge

Where Eagles Dare - 2014 - ARTastic March challenge - DT


Ingredients: Lara’s Digital World Bye Bye Summer Elements Flower 3, Chipboard swirl, Cilenia Curtis Changes – Transfer3, Cilenia Curtis ArtBox13 – B1 (mask textures with butterfly used in background), Basic Grey Lucky Textures – Texture Dots, Cilenia Curtis Fly With Me – various patterned papers layered/masked, etc created in Adobe Fireworks.

LinkWithin

Related Posts Plugin for WordPress, Blogger...